Your first coverage map
This page gets you from nothing to a picture of your Wi-Fi in about ten minutes. It assumes you know nothing about radio. Everything you need to understand is explained where it comes up.
You will need a floorplan of the place you want to cover. A photo of a printed plan works. A screenshot from an estate agent listing works. A scan works. It does not need to be neat, but it does need at least one printed dimension on it, because that is how the app learns how big things are.
No plan to hand?
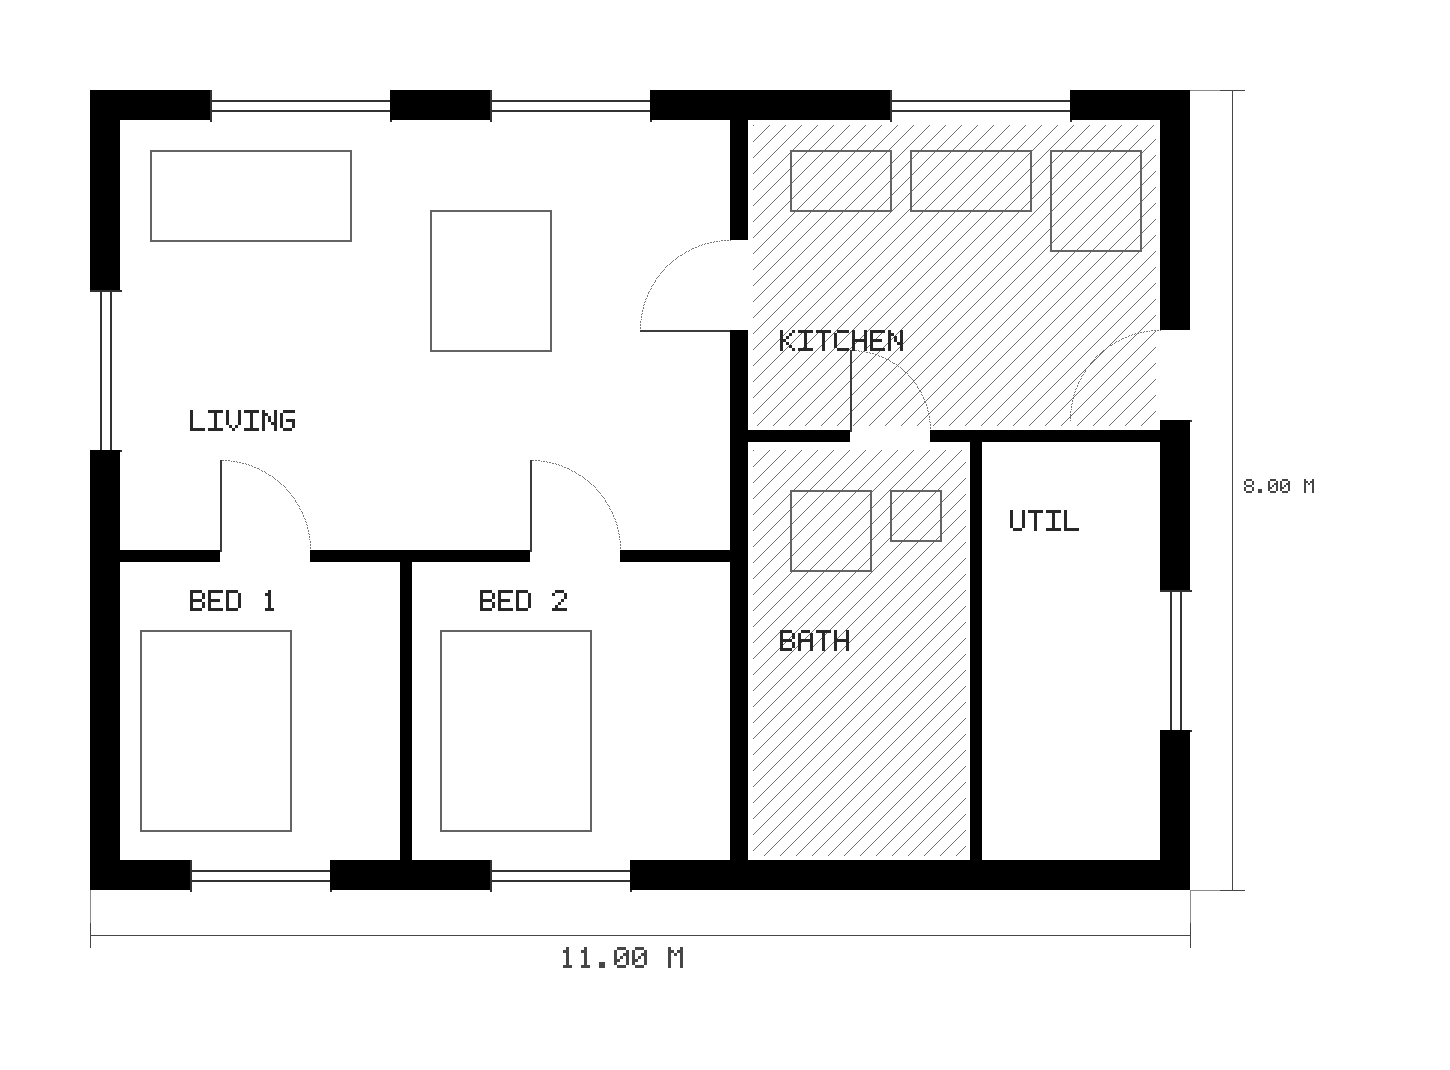
Use the example one. It is a small two-bedroom flat, drawn with the dimension lines, hatching, furniture symbols and lettering that make a real drawing awkward to trace, so working through this page with it teaches the same things your own plan will.
Download the example floorplan
Step 0: open the app
Go to the hosted version. There is nothing to install and no account to make. Everything runs inside your browser, and the floorplan you load never leaves your machine.
If you would rather run it locally, see ways to run it.
Step 1: load the floorplan
Drag your image onto the canvas, or use the button in the sidebar.
The app works in five steps and the sidebar always shows which one you are on, so if you lose your place, look there.
Step 2: trace the walls
This is the step where people get stuck, so take it slowly. What you are doing is telling the app which dark marks on your drawing are walls and which are furniture symbols, dimension lines, hatching and text.
You do this with sliders, and the canvas shows you the result live: everything currently counted as wall turns red.
The slider that matters is "Min stroke half-width". Walls on a drawing are drawn with thick strokes; dimension lines, hatching and lettering are drawn with thin ones. This slider throws away everything thinner than the number you set. Raise it until the thin clutter disappears and only the wall strokes are still red. That one control does most of the work.
For the parts you cannot fix with sliders, there are two tools:
- ROI draws a box around the area you actually care about. Everything outside it is ignored. Use this to cut off title blocks, north arrows and legends.
- Exclude paints out specific regions inside the plan. Use this for detail drawings, stair symbols and furniture blocks that happen to be drawn as thick as a wall.
When the red overlay looks like your walls and nothing else, press Trace walls.
Moving a slider does not re-trace
The sliders only change what is highlighted. Turning that highlight into actual wall lines is a separate, slower step, which is why it has its own button. If you change a slider, press Trace walls again.
Full detail: load and trace a floorplan.
Step 3: tell it how big everything is
Press Pick two points, then click both ends of a dimension that is printed on your plan, and type in what that dimension says in metres.
This step is not optional and it is not a formality. Everything downstream is in metres, and radio behaviour depends strongly on absolute distance. Get the scale wrong by a factor of two and every number the app gives you afterwards is wrong, in a way that will still look completely plausible.
If your plan has no printed dimension, measure something in the real building that you can also identify on the drawing. A door is usually a safe bet: interior doors in most of Europe are 0.80 m or 0.90 m wide.
Full detail: set the scale.
Step 4: build the model
Press Build model in the header. The app now turns your traced lines into a three-dimensional building: walls with height, a floor, a ceiling.
You get a list of wall types. The app has already measured how thick each wall is on your drawing and matched it to the closest build-up it knows, so the defaults are usually reasonable. What you should do is skim the list and fix the ones that are obviously wrong for your building.
Two things are worth your attention:
Windows. The default is double glazing with a soft-coat low-emissivity layer, because that is what almost every window fitted since about 2000 is. That default costs about 29 dB. If your windows are genuinely old and uncoated, change them, because the difference is enormous. If you are not sure, leave the default: it is much more likely to be right.
Ceiling height. Set it to the real one. It decides where the floor and ceiling reflections land, and those carry a serious amount of the signal indoors.
Full detail: build the model.
Step 5: place the router and compute
Add an access point where your router actually is, and set:
- Band, channel and width. If you do not know, 5 GHz and 80 MHz is a reasonable modern default.
- Power. The app can look your exact model up for you: see below.
- How it is mounted. This matters more than people expect. A router standing on a shelf, the same router screwed to a ceiling, and the same router shut inside a cabinet are three different antennas. The cabinet door alone costs a couple of dB in every direction, before any wall.
- What you are measuring coverage for. A phone held in your hand sees a different map from a laptop on a desk, because of height, antenna orientation and the three or so decibels your own body absorbs.
Then press Compute coverage.
Look up your router with AI
In the radio panel there is a button that writes a research brief for your exact model. You paste that into whatever AI assistant you use, paste the answer back, and the app reads the numbers out of it. It then reconciles the conducted power against the EIRP and your regulatory ceiling, and tells you afterwards exactly which fields it took and which are still your own.
It does not call anything itself. You do the asking, so nothing about your project is sent anywhere.
Now read the map
You have a heatmap. Before you trust it, read how to read the map. The short version:
- Signal strength in dBm is not the whole story. A strong signal on a busy channel is worse than a weaker one on a quiet channel.
- The rate map is usually the more useful picture, because it answers the question you actually have, which is whether video will stall.
- Anywhere the map looks surprisingly good, check whether a wall got missed during tracing.
What to do next
- Probe a point. Click anywhere on the map to see the actual ray paths drawn on the plan: which wall the signal went through, what reflected off the ceiling, what bent round the door frame. This is the fastest way to understand why a room is bad.
- Add your neighbours' networks and rank the channels against them.
- Let the optimiser search for a better place to put the router.
- Export an HTML report with every setting and every source in it.
All of that is on the going further page.